- Go to https://console.developers.google.com/apis/dashboard.
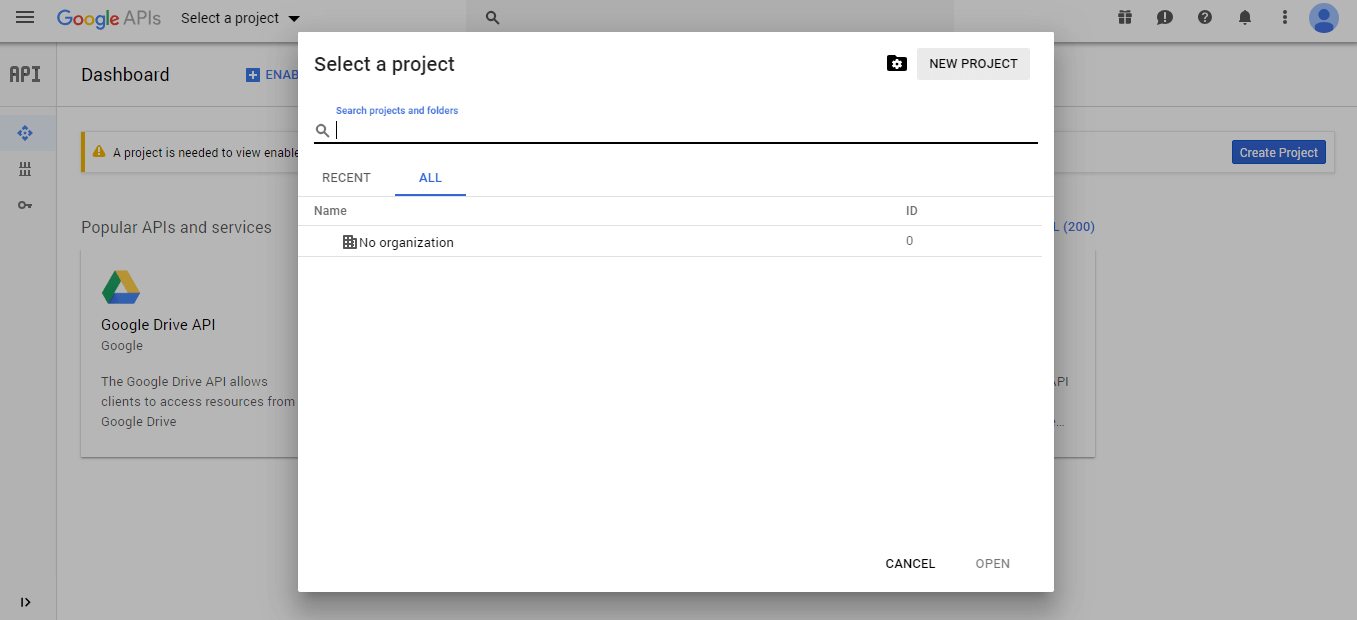
- Press Select a project and click NEW PROJECT.
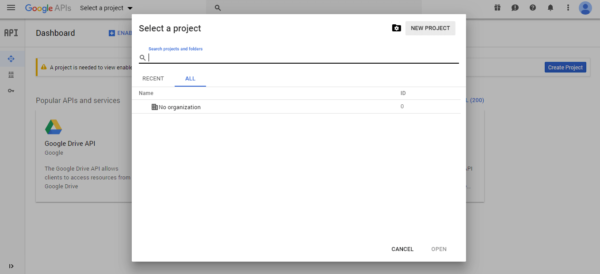
- In the next window enter Project Name and press Create.
- Select a project and go to the Library.
- Search for Google+ API and click on it.

- Press Enable button in this API settings.
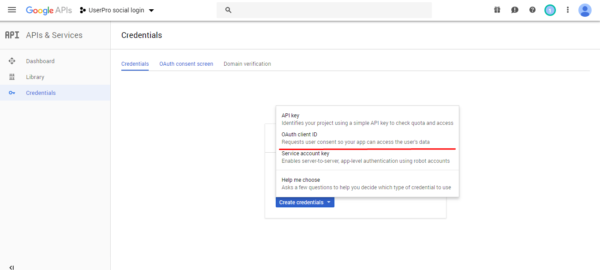
- Go to the Credentials settings and click OAuth consent screen. Fill the fields and click save.
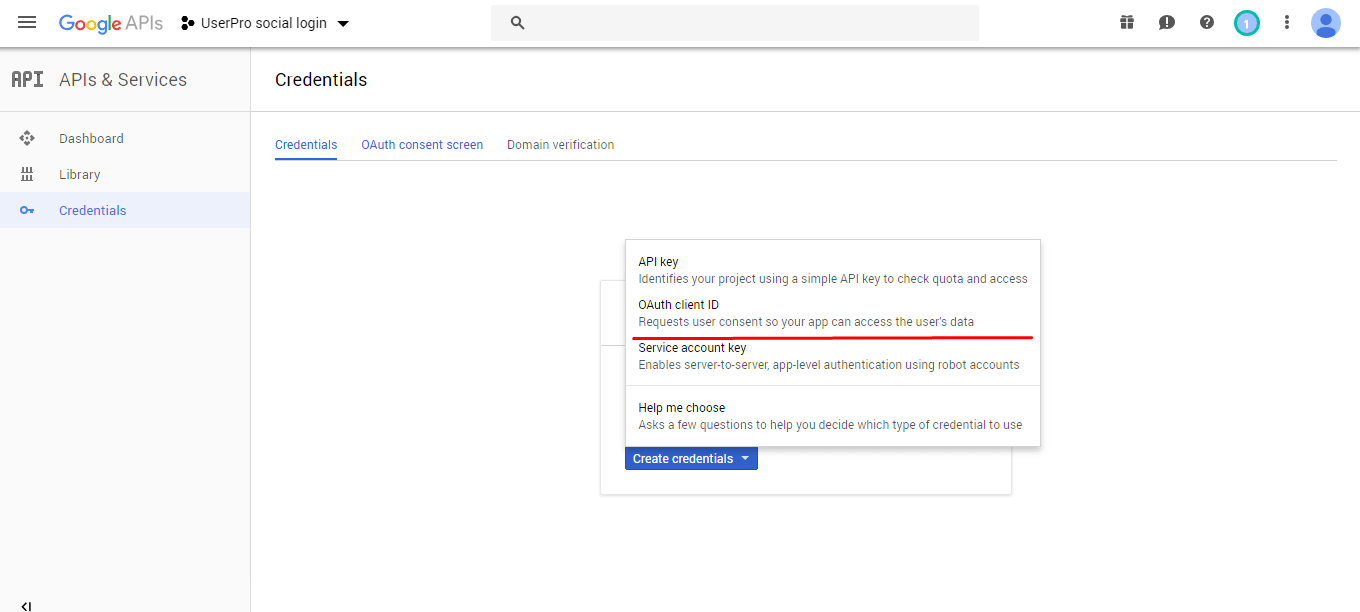
- In the next window click Create credentials and choose OAuth client ID.
- Select Web application, enter Name. In the Authorized redirect URIs field enter your web site url and /wp-content/plugins/userpro/lib/google-auth/auth.php at the end.

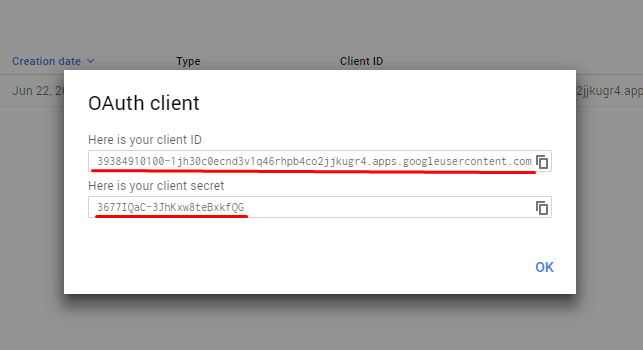
- Click Create button.
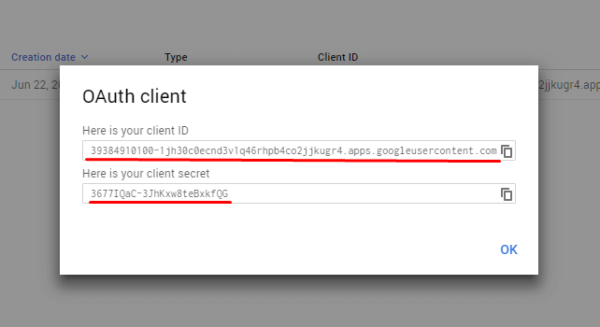
- From the next window Copy Client ID and Client Secret.
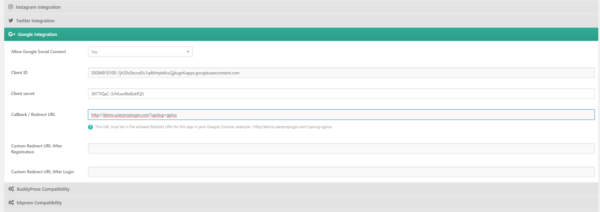
- Now go to your site WordPress dashboard UserPro->Settings->Google integration. Change Allow Google Social Connect setting to Yes. Paste Client ID and Client secret. In the Call/Redirect URL enter your site url and /wp-content/plugins/userpro/lib/google-auth/auth.php. This address should be the same as in the step 9. Additionally an example of Your case will be provided under the input field.
- Click Save Changes.
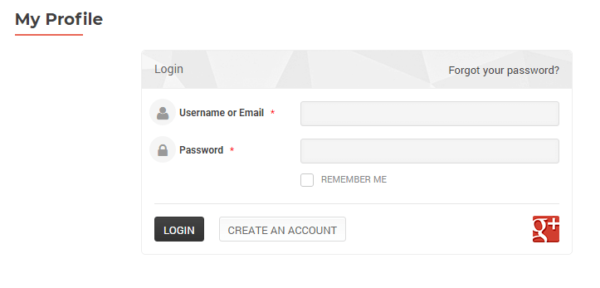
- Now you should able to see Google+ login icon in the login page.


Leave A Comment?