1. Go to https://cloud.google.com/console/project and create a new project in your Google Console.
2. Now go to : https://console.developers.google.com and select the project that you have recently created and Click on Enable API
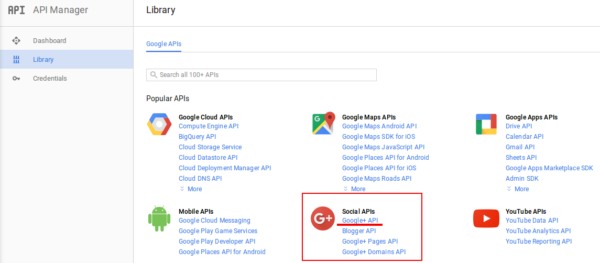
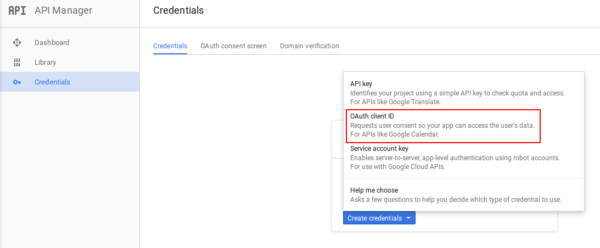
3. Now you will need to enable “Google+ API” under “Social APIs” and follow the steps to create a “OAuth Client ID”. On next Screen you can select the “Web Application”


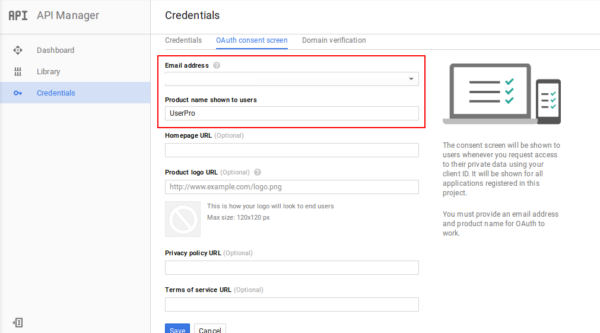
4. From your OAuth Consent screen menu, ensure an email address is selected and product name is entered (your website name is fine). You may also wish to complete the optional sections further and add your website logo. Click Save.
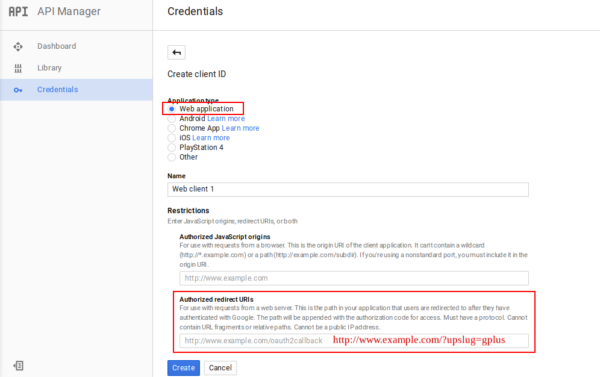
5. From your Credentials menu, please make sure that you have set your Redirect URIs to include your domain name where you will use Google connect and also added ?upslug=gplus to the URL to ensure that this auth will be specific to UserPro use only (See screenshot)
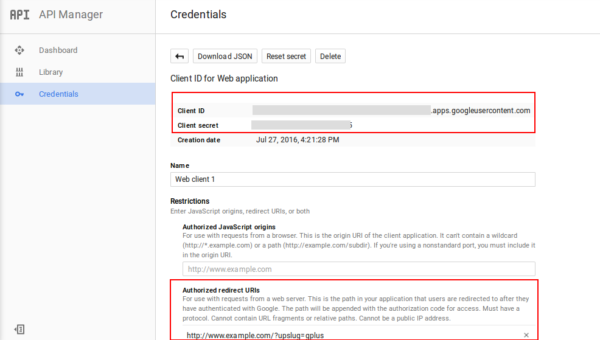
6. Copy your Client ID and Client secret and your Redirect URIs from the same screen.
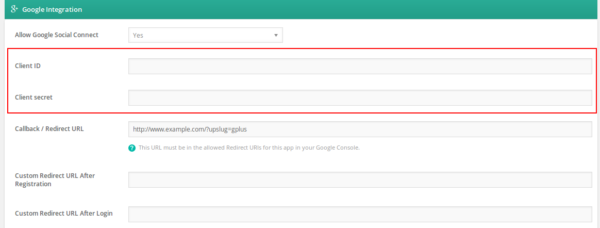
7. Login to your WordPress dashboard and go to UserPro > Global Options > Google Integration
8. Make sure that Allow Google Social Connect is turned on
9. Paste your Client ID and Client secret and your Redirect URIs which you have collected at Step 5 in to the appropriate fields. Note: Your Redirect URI MUST MATCH and MUST INCLUDE ?upslug=gplus in both Google console and your settings
Leave A Comment?